ISO 18119:2018/Amd.1:2021 Gas cylinders — Seamless steel and seamless aluminium-alloy gas cylinders and tubes — Periodic inspection and testing
标准简介
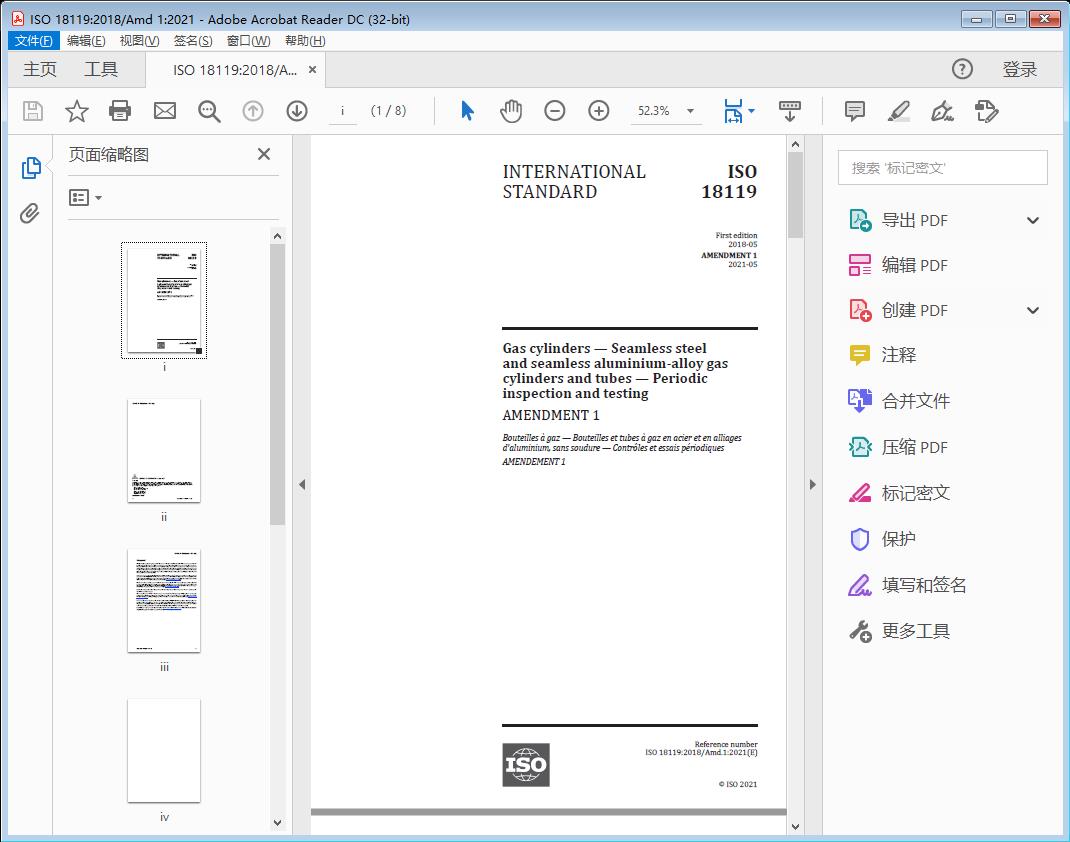
Gas cylinders — Seamless steel and seamless aluminium-alloy gas cylinders and tubes — Periodic inspection and testing是于2018-05发布的ISO标准,适用于全球。标准截图

标准文档说明
标准文档类型为Gas cylinders — Seamless steel and seamless aluminium-alloy gas cylinders and tubes — Periodic inspection and testing高清PDF版本(文字版),标准文档内可进行搜索,可以复制原文,可粘贴。标准部分原文
Gas cylinders — Seamless steel and seamless aluminium-
alloy gas cylinders and tubes — Periodic inspection and testing
AMENDMENT 1
Clause 4
Add the following to the list of abbreviated terms and symbols:
a/t flaw depth ratio (in per cent)
8.1
Replace the second paragraph with the following:
Particular attention shall be given to cylinders containing flammable, oxidizing, corrosive or toxic gases to eliminate risks at the internal inspection stage. See Annex C for a list of gases that are corrosive to steel cylinder material.
Table A.1
Replace footnote f) with the following:
Corrosiveness is with reference to human tissue (see ISO 13338) and NOT cylinder material (e.g. as indicated in Annex C for steel).
B.1
Replace the fourth paragraph with the following:
If the defect size is such that it has reached limits of depth or extent, the remaining wall thickness shall be checked with an ultrasonic device. The wall thickness may be less than the minimum guaranteed wall thickness, when authorized by the competent authority taking into consideration the severity of the defect and safety factors. ISO/TR 22694, and Figures B.6 and B.7 may be used for guidance to evaluate the acceptable size of the defect. When the flaw depth ratio (a/t) is less than or equal to 5 %, the flaw length may be extended for the parallel length of the cylinder.
B.3.3, Table B.3
In the third column (Linear flaws) for seamless steel cylinders, add a second paragraph as follows:
Depth less than or equal to 0,05 t whatever the length (see Figure B.6).
m
In the third column (Linear flaws) for seamless aluminium-alloy cylinders, add a second paragraph as follows:
Depth less than or equal to 0,05 t whatever the length (see Figure B.7).
m
B.3.3, Figure B.6
Replace Figure B.6 with the following:
Key
X flaw length, in mm R reject
Y flaw depth ratio (a/t), in per cent A accept
SOURCE: ISO/TR 22694:2008, Figure 19 (modified).
Figure B.6 — Maximum allowable imperfection sizes for seamless steel cylinders of various compositions
网盘链接
百度网盘:https://pan.baidu.com/s/1QQN5BSTBIie8H_--53U5rw
提取码:qyxe
【温馨提示】大资料ISO是提供信息发布的专业信息类网站,所有内容均由用户发布,不代表本站观点,本站亦不存储所涉及的文件及资料。如有【免费资料】以及【付费资料】,请用户根据自己的需求,自行判断是否需要获取。如有交易诈骗、内容侵权可发送邮件至kf@dzl100.com,我们审查后若发现情况属实,会立即对相关内容进行删除处理。
加载用时:347.1299 毫秒
相关评论
相关文章
-

ISO 18119:2018/Amd.1:2021 Gas cylinders — Seamless steel and seamless aluminium-alloy gas cylinders and tubes — Periodic inspection and testing
Gas cylinders — Seamless steel and seamless aluminium-alloy gas cylinders and tubes — Periodic inspection and testing是ISO于2018-05发布的ISO标准,适用于全球。本次分享的标准文档为高清PDF(文字版),标准文档内可搜索,可复制,可粘贴。本文结尾附网盘链接。
-

ISO 10014:2021 Quality management systems — Managing an organization for quality results — Guidance for realizing financial and economic benefits
Quality management systems — Managing an organization for quality results — Guidance for realizing financial and economic benefits是国际标准化组织(International Organization for Standardization,简称ISO)于2021-04-20发布的ISO标准,适用于世界范围。本次分享的标准文档为高清PDF(文字版),标准文档内可搜索,可复制,可粘贴。本文结尾附网盘链接。
-

ISO 19475:2021 Document management — Minimum requirements for the storage of documents
Document management — Minimum requirements for the storage of documents是国际标准化组织(International Organization for Standardization,简称ISO)于2021‑06‑10发布的ISO标准,适用于全球。本次分享的标准文档为高清PDF(文字版),标准文档内可搜索,可复制,可粘贴。本文结尾附网盘链接。
-

ISO 19206-3:2021 Road vehicles — Test devices for target vehicles, vulnerable road users and other objects, for assessment of active safety functions —Part 3: Requirements for passenger vehicle 3D targets
Road vehicles — Test devices for target vehicles, vulnerable road users and other objects, for assessment of active safety functions —Part 3: Requirements for passenger vehicle 3D targets是ISO于2021‑05‑21发布的ISO标准,适用于全球范围。本次分享的标准文档为高清PDF(文字版),标准文档内可搜索,可复制,可粘贴。本文结尾附网盘链接。
-

ISO 16355-1:2021 Application of statistical and related methods to new technology and product development process —Part 1: General principles and perspectives of quality function deployment (QFD)
Application of statistical and related methods to new technology and product development process —Part 1: General principles and perspectives of quality function deployment (QFD)是ISO于2021-05发布的ISO标准,适用于世界范围。本次分享的标准文档为高清PDF(文字版),标准文档内可搜索,可复制,可粘贴。本文结尾附网盘链接。
-

ISO 16140-3:2021 Microbiology of the food chain — Method validation —Part 3: Protocol for the verification of reference methods and validated alternative methods in a single laboratory
Microbiology of the food chain — Method validation —Part 3: Protocol for the verification of reference methods and validated alternative methods in a single laboratory是国际标准化组织于2021-01发布的ISO标准,适用于全球。本次分享的标准文档为高清PDF(文字版),标准文档内可搜索,可复制,可粘贴。本文结尾附网盘链接。
-

ISO 17226-1:2021 INTERNATIONAL STANDARDIULTCS/IUC 19-1:2021(E)Leather — Chemical determination of formaldehyde content —Part 1: Method using high-performance liquid chromatography
INTERNATIONAL STANDARDIULTCS/IUC 19-1:2021(E)Leather — Chemical determination of formaldehyde content —Part 1: Method using high-performance liquid chromatography是国际标准化组织于2021-02发布的ISO标准,适用于国际范围。本次分享的标准文档为高清PDF(文字版),标准文档内可搜索,可复制,可粘贴。本文结尾附网盘链接。
-

ISO 16321-1:2021 Eye and face protection for occupational use —Part 1: General requirements
Eye and face protection for occupational use —Part 1: General requirements是ISO于2021-03发布的ISO标准,适用于全球。本次分享的标准文档为高清PDF(文字版),标准文档内可搜索,可复制,可粘贴。本文结尾附网盘链接。
-

Petroleum and natural gas industries — Site-specific assessment of mobile offshore units —Part 3: Floating units
Petroleum and natural gas industries — Site-specific assessment of mobile offshore units —Part 3: Floating units是国际标准化组织(International Organization for Standardization,简称ISO)于2021-03发布的ISO标准,适用于国际,世界范围。本次分享的标准文档为高清PDF(文字版),标准文档内可搜索,可复制,可粘贴。本文结尾附网盘链接。
-

ISO 19290:2021 Cigarettes — Determination of tobacco specific nitrosamines in mainstream cigarette smoke — Method using LC-MS/MS
Cigarettes — Determination of tobacco specific nitrosamines in mainstream cigarette smoke — Method using LC-MS/MS是国际标准化组织于2021-02发布的ISO标准,适用于国际范围。本次分享的标准文档为高清PDF(文字版),标准文档内可搜索,可复制,可粘贴。本文结尾附网盘链接。
-

ISO 11737-1:2018/Amd.1:2021 Sterilization of health care products — Microbiological methods —Part 1: Determination of a population of microorganisms on products
Sterilization of health care products — Microbiological methods —Part 1: Determination of a population of microorganisms on products是ISO于2018-01发布的ISO标准,适用于全球范围。本次分享的标准文档为高清PDF(文字版),标准文档内可搜索,可复制,可粘贴。本文结尾附网盘链接。
-

ISO 11665-4:2021 Measurement of radioactivity in the environment — Air: radon-222 —Part 4: Integrated measurement method for determining average activity concentration using passive sampling and delayed analysis
Measurement of radioactivity in the environment — Air: radon-222 —Part 4: Integrated measurement method for determining average activity concentration using passive sampling and delayed analysis是国际标准化组织于2021-03发布的ISO标准,适用于全球。本次分享的标准文档为高清PDF(文字版),标准文档内可搜索,可复制,可粘贴。本文结尾附网盘链接。
-

ISO 14644-17:2021 Cleanrooms and associated controlled environments —Part 17: Particle deposition rate applications
Cleanrooms and associated controlled environments —Part 17: Particle deposition rate applications是国际标准化组织于2021-02发布的ISO标准,适用于全球范围。本次分享的标准文档为高清PDF(文字版),标准文档内可搜索,可复制,可粘贴。本文结尾附网盘链接。
-

ISO 10140-1:2021 Acoustics — Laboratory measurement of sound insulation of building elements —Part 1: Application rules for specific products
Acoustics — Laboratory measurement of sound insulation of building elements —Part 1: Application rules for specific products是国际标准化组织(International Organization for Standardization,简称ISO)于2021-05发布的ISO标准,适用于世界范围。本次分享的标准文档为高清PDF(文字版),标准文档内可搜索,可复制,可粘贴。本文结尾附网盘链接。
-

ISO 10315:2021 Cigarettes — Determination of nicotine in total particulate matter from the mainstream smoke — Gas-chromatographic method
Cigarettes — Determination of nicotine in total particulate matter from the mainstream smoke — Gas-chromatographic methodWARNING — The use of this document can involve hazardous materials, operations and equipment. This document does not purport to address all the safety problems associated with its use. It is the responsibility of the user of this document to establish appropriate safety and health practices and determine the applicability of any other restrictions prior to use.是国际标准化组织(Interna