ISO 13142:2021 Optics and photonics — Lasers and laser-related equipment — Cavity ring-down method for high-reflectance and high-transmittance measurements
标准简介
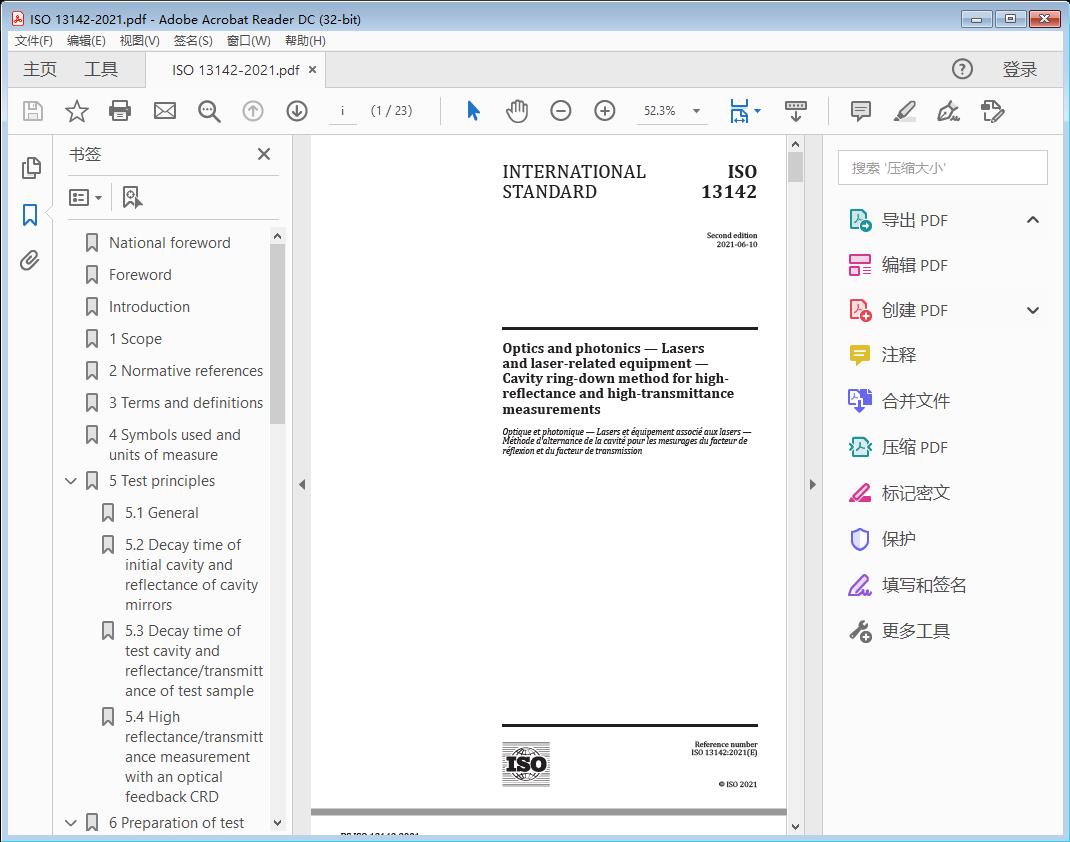
Optics and photonics — Lasers and laser-related equipment — Cavity ring-down method for high-reflectance and high-transmittance measurements是于2021-06-10发布的ISO标准,适用于全球范围。标准截图

标准文档说明
标准文档类型为Optics and photonics — Lasers and laser-related equipment — Cavity ring-down method for high-reflectance and high-transmittance measurements高清PDF版本(文字版),标准文档内可进行搜索,可以复制原文,可粘贴。标准部分原文
INTERNATIONAL STANDARD ISO 13142:2021
Optics and photonics — Lasers and laser-related equipment — Cavity ring-down method for high-
reflectance and high-transmittance measurements
1 Scope
This document specifies measurement procedures for the precise determination of the high reflectance or high transmittance (>99 %) of optical laser components.
The methods given in this document are intended to be used for the testing and characterization of high reflectance of both concave and plane mirrors or high transmittance of plane windows used in laser systems and laser-based instruments. The reflectance of convex mirrors or transmittance of positive or negative lenses can also be tested by taking into consideration the radius of curvature of the mirror surface or the focal length of the lens. This document is complementary to ISO 15368 which specifies the measurement procedures for the determination of reflectance and transmittance of optical components with spectrophotometry. ISO 15368 is applicable to the measurements of reflectance and transmittance in the range from 0 % to 100 % with a typical accuracy of ±0,3 %, and is therefore not applicable to the precise measurements of reflectance and transmittance higher than 99,9 %.
2 Normative references
The following documents are referred to in the text in such a way that some or all of their content constitutes requirements of this document. For dated references, only the edition cited applies. For undated references, the latest edition of the referenced document (including any amendments) applies.
ISO 11145, Optics and photonics — Lasers and laser-related equipment — Vocabulary and symbols
ISO 14644-1, Cleanrooms and associated controlled environments — Part 1: Classification of air cleanliness by particle concentration
ISO 80000-7, Quantities and units — Part 7: Light and radiation
3 Terms and definitions
For the purposes of this document, the terms and definitions given in ISO 11145 and ISO 80000-7 and the following apply.
ISO and IEC maintain terminological databases for use in standardization at the following addresses:
— ISO Online browsing platform: available at https://www.iso.org/obp
— IEC Electropedia: available at http://www.electropedia.org/
3.1
reflectance
3.2
transmittance
ISO 13142:2021
4 Symbols used and units of measure
Table 1 — Symbols used and units of measure
Symbol Term Unit
c speed of light in measurement environment m/s
c speed of light in vacuum m/s
0 h(t) impulse response of the ring-down cavity
h (t) Instrumental response function
0
L length of the initial cavity m
0 L length of the test cavity m
ΔL measurement error of the initial cavity length m
0
ΔL measurement error of the test cavity length m
n refractive index of air in measurement environment
R average reflectance of the concave cavity mirrors, equals square root of R ×R
1 2
R reflectance of the test sample
s
T transmittance of the test sample
s
R , R reflectance of two concave cavity mirrors
1 2
R reflectance of the planar cavity mirror
3
τ instrumental response time s
inst
t time s
u(t) negative-step function
the overall optical loss coefficient (absorption plus scattering) of the gases inside the cavity −1
α m
at the laser wavelength
n refractive index of the transmissive test sample substrate
s
d thickness of the transmissive test sample or central thickness of a lens to be tested m
δ(t) delta function
θ angle of incidence of the test sample rad
ρ radius of curvature of concave surface of the cavity mirror m
τ decay time of the initial cavity s
0 τ decay time of the test cavity s
Δτ measurement error of the decay time of the initial cavity s
0 Δτ measurement error of the decay time of the test cavity s
5 Test principles
5.1 General
The conventional reflectance/transmittance measurement techniques (spectrophotometry and laser ratiometry) are based on measuring the relative changes of light power reflected/transmitted by the test sample. The measurement accuracy is limited by the power fluctuations of the light sources. The cavity ring-down (CRD) technique, on the other hand, is based on the measurement of the decay rate of laser power trapped in a ring-down cavity consisting of at least two highly reflective mirrors. It is therefore totally immune to the power fluctuations of the light sources. The CRD technique can achieve a measurement accuracy that far exceeds the limit set by the power fluctuations of the light sources.
5.2 Decay time of initial cavity and reflectance of cavity mirrors
When a laser beam is coupled into the ring-down cavity, it will gradually leak out of the cavity as a small fraction of the light is transmitted through the cavity mirrors at each reflection. The temporal
网盘链接
百度网盘:https://pan.baidu.com/s/1AhuP7N01tBK5vGP_B-SPwA
提取码:6pcq
【温馨提示】大资料ISO是提供信息发布的专业信息类网站,所有内容均由用户发布,不代表本站观点,本站亦不存储所涉及的文件及资料。如有【免费资料】以及【付费资料】,请用户根据自己的需求,自行判断是否需要获取。如有交易诈骗、内容侵权可发送邮件至kf@dzl100.com,我们审查后若发现情况属实,会立即对相关内容进行删除处理。
加载用时:209.0125 毫秒
相关评论
相关文章
-

ISO 13142:2021 Optics and photonics — Lasers and laser-related equipment — Cavity ring-down method for high-reflectance and high-transmittance measurements
Optics and photonics — Lasers and laser-related equipment — Cavity ring-down method for high-reflectance and high-transmittance measurements是ISO于2021-06-10发布的ISO标准,适用于全球范围。本次分享的标准文档为高清PDF(文字版),标准文档内可搜索,可复制,可粘贴。本文结尾附网盘链接。
-

ISO 10014:2021 Quality management systems — Managing an organization for quality results — Guidance for realizing financial and economic benefits
Quality management systems — Managing an organization for quality results — Guidance for realizing financial and economic benefits是国际标准化组织(International Organization for Standardization,简称ISO)于2021-04-20发布的ISO标准,适用于世界范围。本次分享的标准文档为高清PDF(文字版),标准文档内可搜索,可复制,可粘贴。本文结尾附网盘链接。
-

ISO 19475:2021 Document management — Minimum requirements for the storage of documents
Document management — Minimum requirements for the storage of documents是国际标准化组织(International Organization for Standardization,简称ISO)于2021‑06‑10发布的ISO标准,适用于全球。本次分享的标准文档为高清PDF(文字版),标准文档内可搜索,可复制,可粘贴。本文结尾附网盘链接。
-

ISO 19206-3:2021 Road vehicles — Test devices for target vehicles, vulnerable road users and other objects, for assessment of active safety functions —Part 3: Requirements for passenger vehicle 3D targets
Road vehicles — Test devices for target vehicles, vulnerable road users and other objects, for assessment of active safety functions —Part 3: Requirements for passenger vehicle 3D targets是ISO于2021‑05‑21发布的ISO标准,适用于全球范围。本次分享的标准文档为高清PDF(文字版),标准文档内可搜索,可复制,可粘贴。本文结尾附网盘链接。
-

ISO 16355-1:2021 Application of statistical and related methods to new technology and product development process —Part 1: General principles and perspectives of quality function deployment (QFD)
Application of statistical and related methods to new technology and product development process —Part 1: General principles and perspectives of quality function deployment (QFD)是ISO于2021-05发布的ISO标准,适用于世界范围。本次分享的标准文档为高清PDF(文字版),标准文档内可搜索,可复制,可粘贴。本文结尾附网盘链接。
-

ISO 16140-3:2021 Microbiology of the food chain — Method validation —Part 3: Protocol for the verification of reference methods and validated alternative methods in a single laboratory
Microbiology of the food chain — Method validation —Part 3: Protocol for the verification of reference methods and validated alternative methods in a single laboratory是国际标准化组织于2021-01发布的ISO标准,适用于全球。本次分享的标准文档为高清PDF(文字版),标准文档内可搜索,可复制,可粘贴。本文结尾附网盘链接。
-

ISO 17226-1:2021 INTERNATIONAL STANDARDIULTCS/IUC 19-1:2021(E)Leather — Chemical determination of formaldehyde content —Part 1: Method using high-performance liquid chromatography
INTERNATIONAL STANDARDIULTCS/IUC 19-1:2021(E)Leather — Chemical determination of formaldehyde content —Part 1: Method using high-performance liquid chromatography是国际标准化组织于2021-02发布的ISO标准,适用于国际范围。本次分享的标准文档为高清PDF(文字版),标准文档内可搜索,可复制,可粘贴。本文结尾附网盘链接。
-

ISO 16321-1:2021 Eye and face protection for occupational use —Part 1: General requirements
Eye and face protection for occupational use —Part 1: General requirements是ISO于2021-03发布的ISO标准,适用于全球。本次分享的标准文档为高清PDF(文字版),标准文档内可搜索,可复制,可粘贴。本文结尾附网盘链接。
-

Petroleum and natural gas industries — Site-specific assessment of mobile offshore units —Part 3: Floating units
Petroleum and natural gas industries — Site-specific assessment of mobile offshore units —Part 3: Floating units是国际标准化组织(International Organization for Standardization,简称ISO)于2021-03发布的ISO标准,适用于国际,世界范围。本次分享的标准文档为高清PDF(文字版),标准文档内可搜索,可复制,可粘贴。本文结尾附网盘链接。
-

ISO 11737-1:2018/Amd.1:2021 Sterilization of health care products — Microbiological methods —Part 1: Determination of a population of microorganisms on products
Sterilization of health care products — Microbiological methods —Part 1: Determination of a population of microorganisms on products是ISO于2018-01发布的ISO标准,适用于全球范围。本次分享的标准文档为高清PDF(文字版),标准文档内可搜索,可复制,可粘贴。本文结尾附网盘链接。
-

ISO 19290:2021 Cigarettes — Determination of tobacco specific nitrosamines in mainstream cigarette smoke — Method using LC-MS/MS
Cigarettes — Determination of tobacco specific nitrosamines in mainstream cigarette smoke — Method using LC-MS/MS是国际标准化组织于2021-02发布的ISO标准,适用于国际范围。本次分享的标准文档为高清PDF(文字版),标准文档内可搜索,可复制,可粘贴。本文结尾附网盘链接。
-

ISO 11665-4:2021 Measurement of radioactivity in the environment — Air: radon-222 —Part 4: Integrated measurement method for determining average activity concentration using passive sampling and delayed analysis
Measurement of radioactivity in the environment — Air: radon-222 —Part 4: Integrated measurement method for determining average activity concentration using passive sampling and delayed analysis是国际标准化组织于2021-03发布的ISO标准,适用于全球。本次分享的标准文档为高清PDF(文字版),标准文档内可搜索,可复制,可粘贴。本文结尾附网盘链接。
-

ISO 10140-1:2021 Acoustics — Laboratory measurement of sound insulation of building elements —Part 1: Application rules for specific products
Acoustics — Laboratory measurement of sound insulation of building elements —Part 1: Application rules for specific products是国际标准化组织(International Organization for Standardization,简称ISO)于2021-05发布的ISO标准,适用于世界范围。本次分享的标准文档为高清PDF(文字版),标准文档内可搜索,可复制,可粘贴。本文结尾附网盘链接。
-

ISO 14644-17:2021 Cleanrooms and associated controlled environments —Part 17: Particle deposition rate applications
Cleanrooms and associated controlled environments —Part 17: Particle deposition rate applications是国际标准化组织于2021-02发布的ISO标准,适用于全球范围。本次分享的标准文档为高清PDF(文字版),标准文档内可搜索,可复制,可粘贴。本文结尾附网盘链接。
-

ISO 10315:2021 Cigarettes — Determination of nicotine in total particulate matter from the mainstream smoke — Gas-chromatographic method
Cigarettes — Determination of nicotine in total particulate matter from the mainstream smoke — Gas-chromatographic methodWARNING — The use of this document can involve hazardous materials, operations and equipment. This document does not purport to address all the safety problems associated with its use. It is the responsibility of the user of this document to establish appropriate safety and health practices and determine the applicability of any other restrictions prior to use.是国际标准化组织(Interna